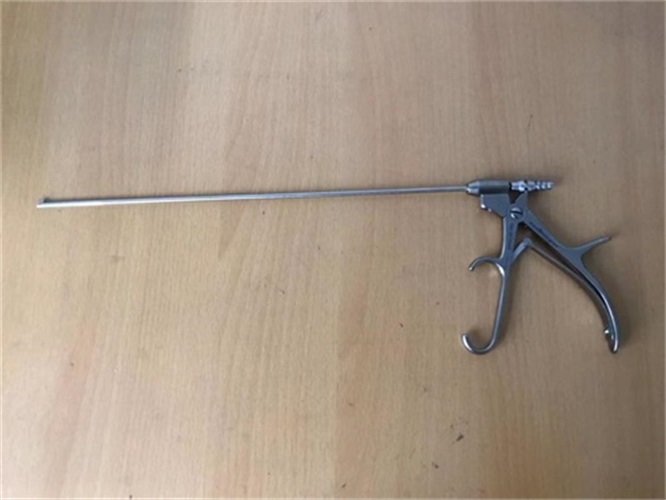
由于內(nèi)窺鏡的構(gòu)造比較精細,材料相對較為特殊,管腔多且無法采用高溫消毒,因此大多數(shù)都通過化學(xué)消毒劑浸泡儀器及其附件來進行清洗消毒。下面
內(nèi)窺鏡設(shè)備維修人員來講講具體的消毒步驟吧。
Because the structure of the endoscope is fine, the materials are relatively special, and the lumens are too many to be sterilized at high temperature, most of them are cleaned and disinfected by soaking the instrument and its accessories with chemical disinfectants. Next, the endoscope equipment maintenance personnel will talk about the specific disinfection steps.
①預(yù)備工作
① Preparatory work
在檢查床側(cè)的時候,利用酶潔液紗布將鏡身上粘液擦拭干凈,并反復(fù)地送氣及送水到加酶液體中,超過10秒以后將主機的電源關(guān)閉,在內(nèi)窺鏡電氣接頭處蓋上防水蓋并將之擰緊,把內(nèi)窺鏡卸下來送進洗消間。
At the side of the examination table, use the enzyme detergent gauze to wipe the mucus on the mirror body clean, and repeatedly send air and water to the enzyme adding liquid. After more than 10 seconds, turn off the power of the host, cover and tighten the waterproof cover at the electrical connector of the endoscope, and remove the endoscope and send it to the disinfection room.
②漏水檢查
② Water leakage inspection
在防水蓋通氣的接口上接住測漏器的接口蓋,測漏器的接頭連接上清洗消毒相關(guān)設(shè)備的測漏器的連接管,在水中把內(nèi)窺鏡盤旋浸泡其中,并打開測漏開關(guān),在確認了內(nèi)窺鏡已經(jīng)充氣后,查看操彎的曲部是否出現(xiàn)膨脹以及操作部是否持續(xù)出現(xiàn)氣泡,并把操作部的大小角度調(diào)整到至大,然后再次對彎曲橡皮進行觀察,如果發(fā)現(xiàn)氣泡連續(xù)的冒出,說明內(nèi)窺鏡出現(xiàn)了漏水,須馬上送去立即檢修。
Connect the interface cover of the leak detector on the vent interface of the waterproof cover, connect the connector of the leak detector to the connecting pipe of the leak detector for cleaning and disinfecting related equipment, hover the endoscope in water, and turn on the leak detection switch. After confirming that the endoscope has been inflated, check whether there is expansion in the curved part of the operating part and whether bubbles continue to appear in the operating part, and adjust the size angle of the operating part to a large one, Then observe the bent rubber again. If bubbles are found to emerge continuously, it means that the endoscope has water leakage, and it must be sent for immediate maintenance.
③初步清洗
③ Preliminary cleaning
利用清潔布在流動水中對鏡身進行反復(fù)清洗,把活檢帽、送水及送氣的按鈕以及吸引器的按鈕摘下,使用高壓水槍對各管道進行沖洗。通過清洗刷對內(nèi)窺鏡刷洗,然后把毛刷上的污濁物清除,正常情況下管道需要沖洗2、3次。
Clean the mirror body repeatedly with a cleaning cloth in flowing water, remove the biopsy cap, the buttons for water and air supply, and the buttons of the aspirator, and use a high-pressure water gun to wash the pipes. Brush the endoscope with a cleaning brush, and then remove the dirt on the brush. Normally, the pipe needs to be flushed 2 or 3 times.
把自動灌流器內(nèi)的注液口和內(nèi)窺鏡清洗管道連接在一起,同時在槽內(nèi)連接上吸液導(dǎo)管,啟動灌流器,從而給內(nèi)窺鏡全流程進行清水,在灌注超過半分鐘以后,把管道里的液體排干凈。
Connect the liquid filling port in the automatic perfusion device with the endoscope cleaning pipe, and connect the liquid suction pipe in the tank to start the perfusion device, so as to clean the whole process of the endoscope. After more than half a minute of perfusion, drain the liquid in the pipe.
④酶洗
④ Enzyme washing
把內(nèi)窺鏡放進酶洗槽中,自動灌流器的那個注液口要連接上內(nèi)窺鏡的清洗管道,同時把吸液導(dǎo)管連接到酶洗槽內(nèi),將灌流器啟動,全流程利用酶液給內(nèi)窺鏡進行半分鐘以上灌注,而浸泡時間須超過3分鐘,每清洗完一條內(nèi)窺鏡后,就要更換酶液。
Put the endoscope into the enzyme washing tank. The liquid filling port of the automatic perfusion device should be connected to the cleaning pipe of the endoscope. At the same time, connect the suction catheter to the enzyme washing tank. Start the perfusion device. The whole process uses the enzyme solution to inject the endoscope for more than half a minute, while the soaking time must exceed 3 minutes. After each endoscope is cleaned, replace the enzyme solution.

⑤次洗
⑤ Secondary washing
按照初洗時的相關(guān)要求,利用流動水把內(nèi)窺鏡上的酶液清洗干凈,把灌流器注液口連接上內(nèi)窺鏡的清洗管,同時把吸液導(dǎo)管連接到酶洗槽中,將灌流器啟動,給內(nèi)窺鏡全流程進行半分鐘以上的酶液灌注,排盡其管道中的液體,并利用高壓氣槍將各個管道內(nèi)所殘留的酶液吹干,將內(nèi)窺鏡搽拭干凈,全程用時大概2~3分鐘。
According to the relevant requirements for initial washing, use flowing water to clean the enzyme solution on the endoscope, connect the liquid filling port of the perfusion device to the cleaning tube of the endoscope, and connect the suction catheter to the enzyme washing tank, start the perfusion device, inject the enzyme solution into the whole process of the endoscope for more than half a minute, drain the liquid in the pipeline, blow the residual enzyme solution in each pipeline with a high-pressure air gun, and wipe the endoscope clean, The whole journey takes about 2-3 minutes.
⑥消毒
⑥ Disinfection
利用消毒液完全將內(nèi)窺鏡浸泡,把灌流器注液口連接到內(nèi)窺鏡的清洗管上,同時把吸液導(dǎo)管連接到消毒槽內(nèi),將灌流器啟動,利用消毒液全流程對內(nèi)窺鏡進行超過半分鐘的灌注,在內(nèi)窺鏡浸泡了半個小時以后,把管道中的消毒液全部排干凈。
Immerse the endoscope completely with disinfectant, connect the liquid filling port of the perfusion device to the cleaning pipe of the endoscope, connect the suction catheter to the disinfection tank, start the perfusion device, use the whole process of disinfectant to inject the endoscope for more than half a minute, and drain all the disinfectant in the pipeline after soaking the endoscope for half an hour.
⑦終洗
⑦ Final washing
工作人員將手套更換,把經(jīng)過了浸泡消毒的內(nèi)窺鏡放到終洗槽中,利用流水對內(nèi)窺鏡進行清洗,把灌流器的注液口連接到內(nèi)窺鏡的清洗管上,同時把吸液導(dǎo)管連接到終洗槽中,將灌流器啟動,給內(nèi)窺鏡全流程進行清水灌注,在半分鐘后,排干凈管道里的液體,并將其吹干以備下次再用。
The staff replaced the gloves, put the endoscope that had been soaked and disinfected into the final washing tank, cleaned the endoscope with running water, connected the liquid filling port of the perfusion device to the cleaning pipe of the endoscope, and connected the suction pipe to the final washing tank, started the perfusion device, and filled the whole process of the endoscope with clean water. After half a minute, the liquid in the pipe was drained and dried for next use.
在內(nèi)窺鏡保存前,把所有可以拆卸下來的部件包括防水蓋、吸引按鈕、送水送氣按紐以及活檢帽等,將之從內(nèi)窺鏡上面拆下來,并確認內(nèi)窺鏡的表面已經(jīng)完全干燥,并把內(nèi)窺鏡角度卡鎖設(shè)置為“F”,終在儲鏡柜中懸掛保存,其插入部要盡量地伸直。更多相關(guān)內(nèi)容就來我們網(wǎng)站
http://m.thefunfoodfactory.com咨詢吧!
Before the endoscope is stored, remove all detachable parts, including waterproof cover, suction button, water and air supply button, and biopsy cap, from the endoscope, and confirm that the surface of the endoscope has been completely dry. Set the angle lock of the endoscope to "F", and hang it in the storage cabinet for storage. The insertion part should be as straight as possible. More relevant content will come to our website http://m.thefunfoodfactory.com Consult!


 公司:匠仁醫(yī)療設(shè)備有限公司